 |
|||
How to Connect a Notebook running Windows XP to CaféNET
This "How to..." contains the following topics;
- How to turn on your WiFi adapter
- Automatically Connecting to CaféNET
- Trouble Shooting you Connection
Turn on your WiFi adapter
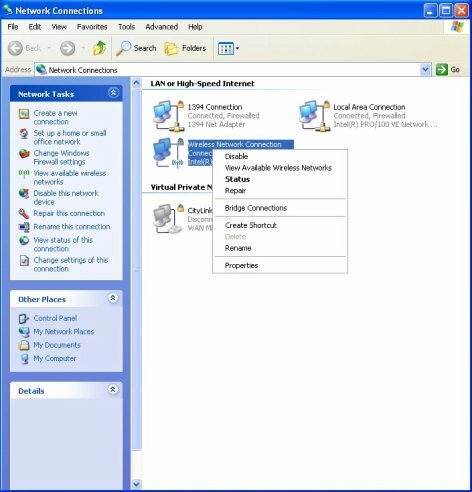
Ensure your wireless connection is enabled.- You may have a button or switch on your notebook or Click Start, then select Control Panel.
- Click Network and Internet Connections. The Network and Internet Connections window opens.
- Click Network Connections. The Network Connections window opens.
- Right-click Wireless Network Connection.
- Select Enable to turn on wireless connection or Disable to turn off wireless connection.
Connect to CaféNET
Once the wireless connection is turned ON your notebook should automatically scan for available WiFi networks:

- As instructed click to View Available Wireless Networks. The Wireless Network Connection dialog box opens.
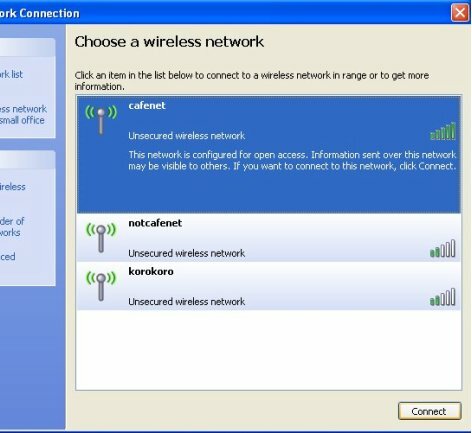
- Select "cafenet" and then click the "Connect" button. Notice that the list of available connections also provides a bar graph showing the network signal strength.
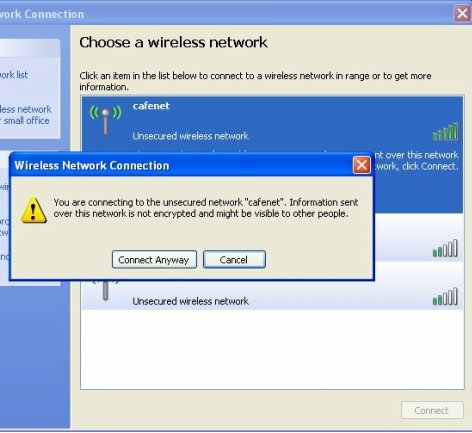
- Click "Connect Anyway"
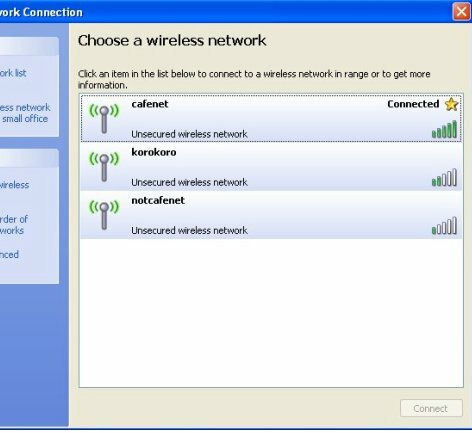
- This action will connect your notebook to CaféNET, you should get the following indicator...
- Now open you browser, your normal homepage request should be automatically redirected to cafenet.co.nz
Trouble Shooting your Connection
Setting Up DHCP
To ensure you have a valid CaféNET IP address you must have correct "Internet Protocol (TCP/IP) Properties" set up. To do this;
- Click Start, then select Control Panel.
- Click Network and Internet Connections. The Network and Internet Connections window opens.
- Click Network Connections. The Network Connections window opens.
- Right-click Wireless Network Connection.
- Select Properties. The Wireless Network Connection Properties dialog box opens.
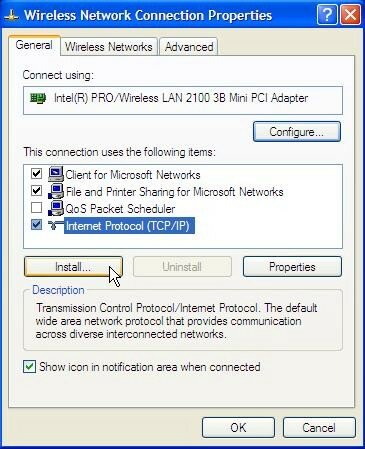
- Select Internet Protocol (TCP/IP) then click the "Properties" button.
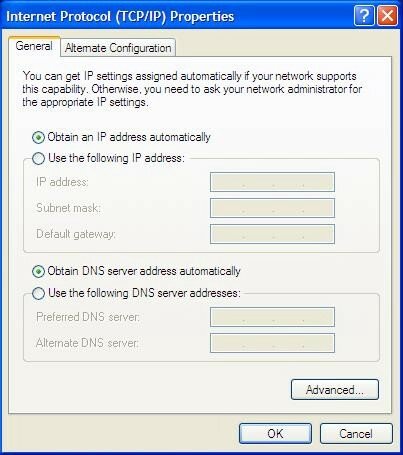
- Ensure that both "obtain an IP address automatically" and "obtain DNS server address automatically" are both set.
It is recommended that CaféNET users have a personal firewall running on their Notebook. How to turn on the Windows XP firewall